 Introductions:
We have now a software depositories ;what we want more are to tandem it with 'OPAC's and that our prospects -VuFind and Koha. Since Koha was very a prominent OPAC software I don't have a second options but to include it as a candidate for testing and evaluations .Another is the VuFind, as of now we have the impression that it has a more simplified version and is very promising software than its counterparts-well, let's see.
Let us first introduce Koha,this OPAC was originally developed for the Horowhenua Library Trust by Katipo Communications,New Zealand in 1999 (kiwi people). The first version of Koha went live at HLT in January 2005.And there are a lot of support being shared all around open source community with a dedicated team that enhance its bug , features and add-ons from time to time.
So now we proceed to actions ;debugging an OPAC powered by Koha-mwha!
Koha features:
-A full featured modern integrated library system (ILS).
-Award winning and open source no license fee, ever.
-Linux, Unix, Windows and Mac OS platform.
-Web Based.
-We can full integrate it into your website.
-Copy cataloging and z39.50.
-MARC21 and UNIMARC for professional catalogers.
-Tailored catalog module for special libraries.
-Use as a document manager or digital library.
-Manage online and off line resources with the same tool.
-RSS feed of new acquisitions.
-E-mail and/or text patron's overdues and other notices.
-Print your own barcodes.
-Serials management module.
-Full catalog, circulation and acquisitions system for library stock management.
-Web based OPAC system (allows the public to search the catalog in the library and at home).
-Simple, clear search interface for all users.
- Simple and comprehensive acquisition options.
- Koha is multi-tasking and enables updates of circulation, cataloging and issues to occur simultaneously.
Objectives:
To use Koha software package for online OPAC
To test Koha features
To compare Koha with VuFind
To evaluate Koha in production
Requirements:
Recommendations to install Koha:
- Pentium II or a higher specs
- Debian Linux package
- Apache
- MySQL
- Perl
- KOHA (http://download.koha.org/?C=N;O=D)
- Software extras
Methodology:
Here are some straight forward method to succeed in installing,configuring and deploying KOHA.
1) Installing Perl compiler
root@localhost# yum install perl
root@localhost# perl-CPAN*
2) Install Perl libraries
root@localhost# yum install perl-
(Please use Yum to download and install package)
mysql-devel,
libxml2-devel, quagga
libxslt-devel, tcl, bzip2-devel, gcc, ncftp,
wget, gdbm-devel, expat-devel, tcp_wrappers ,
libicu , libicu-devel
mysql-bench
mod_auth_mysql
php-mysql
mysql-connector-odbc
mysql-devel
yaz
Please use Cpan to install and download Pearl libraries and add-ons-(the mt. Everest of installations )
install XML::SAX
install XML::LibXMLinstall XML::LibXSLT
install XML::LibXML::SAX::Parserinstall XML::RSSinstall XML::SAX::Writer
install Algorithm::CheckDigits
install Test::Pod
install Test::Pod::Coverage
install Biblio::EndnoteStyle
force install DBD::mysql
force install DBD::SQLite2install GD
install DBIinstall FreezeThaw
install CGI::Session::Serialize::yamli
install CGI::Simple
install Class::Accessorinstall Class::Factory::Util
install Date::Calc
install Sub::Name
install ExtUtils::CBuilder
install Data::ICal
install Email::Date
install HTML::Template::Proinstall HTML::Scrubber
install HTML::Template::Proinstall MARC::Recordinstall MARC::Crosswalk::DublinCore
install MARC::File::XMLinstall MARC::Charsetinstall PDF::API2
install PDF::Reuse
install PDF::Reuse::Barcode
install Lingua::Stem
install Test::Distribution
install List::MoreUtils
install MIME::Lite
install Mail::Sendmail
install POE
install Tk
install Term::ReadKey
install Event
install Curses
install Schedule::At
install Text::CSV
install Text::CSV_XS
install Text::Iconv
install Test::Differences
install JSON
install YAML::Syck
install HTTP::OAI
install Net::Z3950
Install Net::Z3950::ZOOM
install Unix::Syslog
Note:
here are some of the updates during my installations
install Biblio::EndnoteStyle 0.05
install Date::ICal 1.72
install Digest::SHA 5.43
install GD 2.39
install IPC::Cmd 0.46
install Net::Z3950::ZOOM 1.16
install SMS::Send 0.05
install Text::CSV::Encoded 0.09
install e XML::LibXSLT 1.59
install XML::RSS 1.31
3) Instal Mysql and libraries
root@localhost# yum install mysql*
3-1) Configure mysql database
Set a new password
root@localhost# service mysqld stop
root@localhost# mysqld_safe --skip-grant-tables &
3-2) Connect to mysql server using mysql client
root@localhost mysql -u root password (
just press enter)mysql> use mysql;
mysql> update user set password=PASSWORD("
password1234") where User='root';
mysql> flush privileges;
mysql> quit;
3-3) Create Database
mysql> create database koha;
mysql> grant all privileges on koha.* to '
kohaadmin'@'localhost' identified by '
password1234';
4) Install web container (Apache)
root@localhost# yum install httpd*
5) Download and Install koha
root@localhost# wget www.koha
5-1)Install Koha(latest version)
root@localhost# cd PATH_Koha/
root@localhost# perl Makefile.Pl
root@localhost# make
root@localhost# make test
root@localhost# make install
5-2) Configure Koha:
5-2-1)Create a symlink in apache
root@localhost# ln -s /etc/koha/koha-httpd.conf /etc/httpd/conf.d/
5-2-2) To access koha on all IP(LAN/WAN)
root@localhost# vim /etc/httpd/conf.d/koha-httpd.conf
Check this in koha-httpd.conf #Opac < VirtualHost *:80 > #Intranet < VirtualHost *:8080 >
5-3) Test and browse Koha system
Client side
http://localhost:80
Administrator Side
http://localhost:8080
Detail(1) Successful installation of KOHA
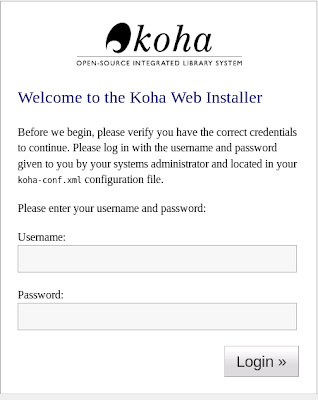
 Detail(2)
 Login
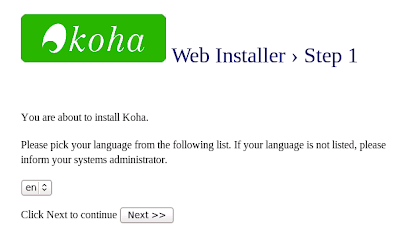
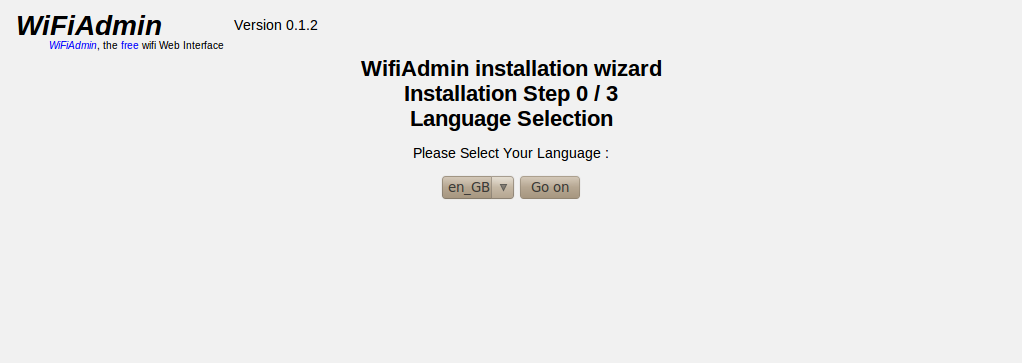
 Detail(3)
 Installer -Step 1
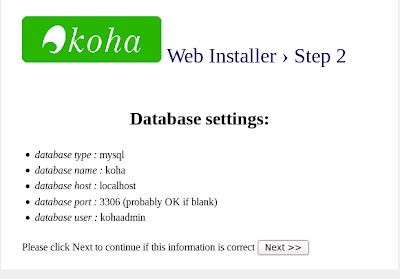
 Detail(4)
 Installer -Step 2
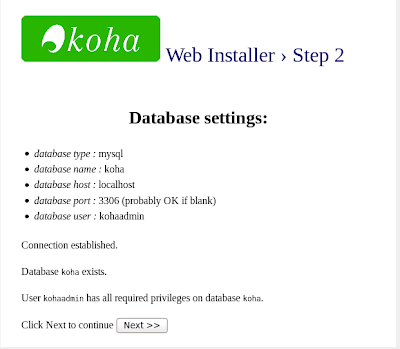
 Detail(5)
 Installer -Step 2
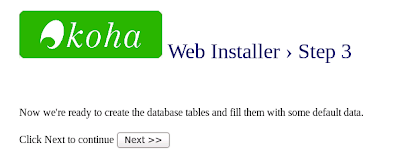
 Detail(6)
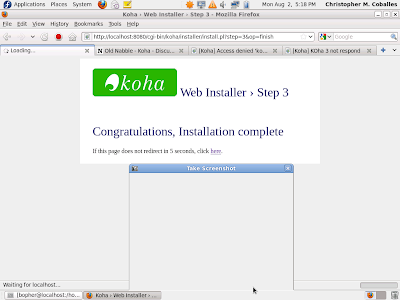
 Installer -Step3
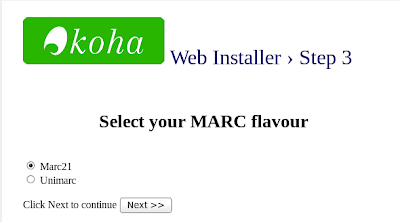
 Detail(7)
-Installer -MARC
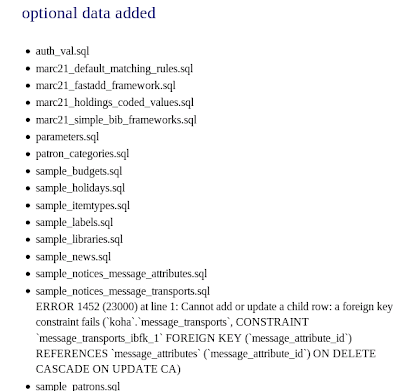
 Detail(8)
- Optional Added
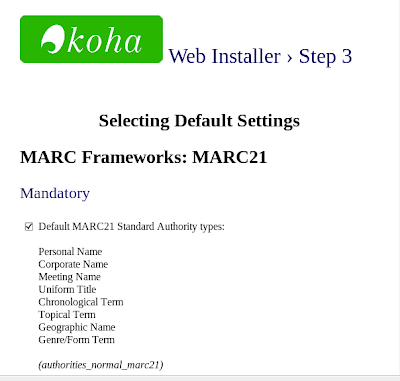
Detail(9)
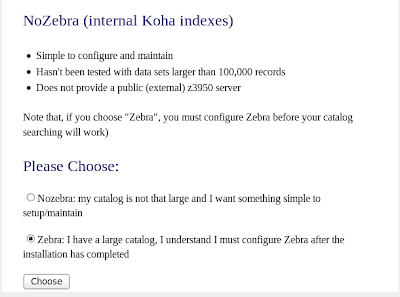
Detail(10)- No Zebra
Detail(11) Successful/complete installations
 Detail(12)
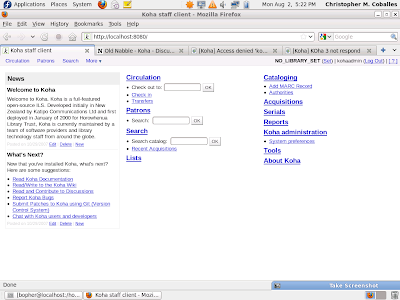
 Admin control panel
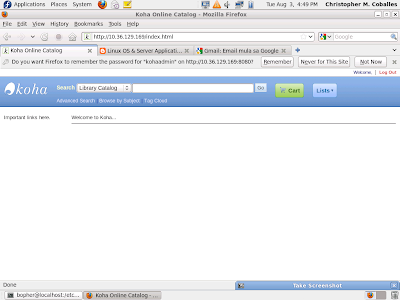
Detail(13) OPAC client window
Remarks:
Well, one thing to note if the guide you are following does not continue as it was expected perhaps you should read now how the "config","make","make install" created an error display.
I would enumerate those possible problems:
1) Please identify each equivalent/appropriate version,what I mean is the contemporary dates when all of the the required packages were compiled and had worked out.
2)Please not some --prefixes (the correct path file installations)
3) You need to check if it needs you to setup environment variable or rather use "export"
4)Never ever forget to activate "MySQL" they must be running for such an applications to create its own database: field,name,tables ,user name, password -sometimes that was an inevitable case.
5)But in KOHA particularly, the tweak will much occur in the CPAN installations ; you can just cut and paste all the commands for eache package s to be installed by CPAN- and these were posted above. Try to force the installation if it does not continue on the first time of command of installing it. Otherwise it has other package dependencies needed to be compiled yet .Oh! this group of YAZ :applications(Yaz.x.y.z.tar.gz,libyaz.x.y.z and libyaz-devel.x.y.z) ,was a little bit confusing to mine so much so of its progress or development to CentOS ;painstakingly how can we find file just as where and how to fix its right version. I would rather suggest , why not KOHA used other package instead of YAZ ?I think there are alot of alternatives application in replacement to YAZ-the community should be serious about it though.
6) Here is another important tips for installing Net::Z3950::ZOOM is to try all available encryptor / decryptor in YUM. As different OS may vary names for these(so better try yum install *crypt*) instead. Perhaps also wrappers, I was enchanted resolving Z3950 files and turn it out installing this way -yum install *wrap* (oh thanks for a wild characters -KoHA is getting wild).
7)Please take note that if your web browser displayed errors "403" or "404" which mean to say that your apache web server (or common httpd) does not allow your koha url to be accessible (index.html-mainpage.pl).So try to add this line and I had my directory located here->
/usr/local/koha) and all the compiled packages.Please put
and enclosing the statement below.
==============
=====================
AllowOverride All
Options MultiViews -Indexes Includes FollowSymLinks
Order allow,deny
Allow from all
===================================
or this one
==============
=====================
AllowOverride All
Options ExecCGI
===================================
8) Don't forget to create a "koha " database usually this is the primary cause of an error .It could be avoided this way-create a database first before installing koha.
Given:
Database = "koha"
Administrator account ="kohaadmin"
Hostname =" localhost"
Password ="password"
#mysql -u root -p
password (
just press enter)
mysql>create database koha;
mysql>grant all privileges on koha.* to 'kohaadmin'@'localhost' identified by 'password';
9) Well , better install all the files required by CPAN
10) If you are using Fedora X.X version, make sure that selinux is disabled.
That is all folks!
Conclusions:
Its free but not the painstakingly hardship debugging its installations- make you stressed after a success


