Thursday, July 4, 2013

HOCR2PDF - ExactCode-ExactImage in Linux(Fedora 1X)

Introductions:

Hello folks ! once again, this tutorial is all about building special functions that  could  be used to process images:OCR, bar-code,grey-scaling and etc. Actually this guide should not be included in the techno-blog; but I was compromised to put the document here to avoid   head ache experience again.It's been awhile  since I've debugged the  exact-image libraries so I've forgotten the  "howtos"  necessary   for a quick  set-up -not even worried about  taking notes then. Just recently ,when I decided to upgrade my deployed OS into a newer version ,I didn't expect that it would take  almost 3 days for me to compile those object modules and  libraries-really a head ache . So this time, I've realized that it's not a good practice to ignore even a little pieces of notes (patches,revision,repositories and etc) in recalling  included files patched in  the program -especially if its free. 

Anyway let me share to you the usefulness of the ExactCode software.The software is a fast, modern and generic image processing library .It  includes codecs  allowing library users to implement their own data sources and destinations, such as in memory locations or network transfers.It is know as viable alternative to ImageMagick. The software was prototyped the needed code in C++, just for speed, and achieved processing times about 1/20th of what ImageMagick consumed. It features explore several new algorithms, e.g. for de-screening, data-dependent triangulation scaling, loss-less JPEG transforms and others needed for fast image processing.

Below are the instructions on how you can install  and build exactimage which includes programs for fast image processing.I've also attached video on how the OCR(hocr2pdf)  program functions in searching  different texts in a PDF viewer. You can use each program in the command line as I've written how-to's and instructions in the testing portion of this blog.You may cut and paste all included examples and see for yourself if it indeed does its job  more than what is expected.But , hey,don't forget to jot some notes before you will forget its procedures.Otherwise  you will experience headache in the future as you wanted to try it once more. A sort of advise folks!

Requirements:
Linux OS: Fedora 18 64 bit
Server ,i7 core
ExactCode image processing library
Cuneiform  (installed)
Tesseract   (installed)

Methodology:

Download
root@localhost#  wget http://exactcode.de/exact-image.0.8.x.tar.bz2
root@localhost#  svn co https://exactcode.de/exact-image/trunk exact-image.8.x

Installations:
 
root@localhost# yum install
gcc gcc-c++  libstdc++
libXrender libXrender-devel
libaa libaa-devel
libX11 libX11-devel
agg agg-devel
freetype2 freetype2-devel
evas  evas-devel
libjpeg libjpeg-devel
libtiff libtiff-devel 
libpng  libpng-devel
libungif  libungif-devel
jasper   jasper-devel
expat expat-devel
openexr  openexr-devel
lcms  lcms-devel
barcode barcode-devel
swig  swig-devel
lua lua-devel
perl perl-devel   perl-ExtUtils-Embed
php  php-devel
python python-devel
ruby   ruby-devel

root@localhost# tar -jxvf exact-image.8.x.tar.bz2
root@localhost# cd exact-image.8.x/
root@localhost# ./configure --prefix=/usr/local/scanner
root@localhost# make && make install

Testing:
Note:
This CLI based program can createa searchable PDF from hOCR input

hocr2pdf: Is a command line front-end for the image processing library to create perfectly layouted, searchable PDF files from hOCR, annotated HTML, input obtained from an OCR system.

(1) hOCR, annotated HTML, input must be provided to STDIN, and the image data is read using the filename from the -i or --input argument. For example: 

roott@localhost# hocr2pdf -i scan.tiff -o test.pdf < cuneiform-out.hocr

(2) By default the text layer is hidden by the real image data. Including image data can be disabled via the -n, --no-image, so that just the recognized text from the OCR is visible - e.g. for debugging or to save storage space: 
root@localhost# hocr2pdf -i scan.tiff -n -o test.pdf < cuneiform-out.hocr

(3) If too many gabs between letters in individual words as this might be a problem with imprecise OCR data or justified text with huge gabs. Hocr2pd in ExactImage includes a special mode activated with the command line argument -s, --sloppy-text, to group glyphs between whitespace to words which can help PDF viewers to produce better results while cut and pasting text:

root@localhost#hocr2pdf -i scan.tiff -s -o test.pdf < cuneiform-out.hocr


Details:

0) Exact-Image.8.8  files


(1)Plane image (Tiff file)


(2) hOCR generated text


3) Hocr2pdf script which is called every processing OCR


4) OCR searchable texts in PDF viewer


Remarks:
(1)Troubles:
png error [1]

Shooting:
Note: libpng12 in ExactImage depreciated and causes  bug in the compilation so  better delete  "png.hh" and "png.cc"
root@localhost# cd /codecs
root@localhost# rm -rf png.*

(2)Troubles
/usr/bin/ld: cannot find -lXrender

Shooting
Note: locate the xrender files

root@localhost#  locate Xrender
/usr/lib/libXrender.so.1
/usr/lib/libXrender.so.1.3.0
/usr/lib/vmware/lib/libXrender.so.1
/usr/lib/vmware/lib/libXrender.so.1/libXrender.so.1
/usr/lib/vmware-installer/1.1/lib/lib/libXrender.so.1
/usr/lib/vmware-installer/1.1/lib/lib/libXrender.so.1/libXrender.so.1

Note: As far as Linux is concerned, you do not have libXrender.so (even though you have libXrender.so.1 and libXrender.so.1.3.0).
This is easy to fix though. All you need is a symbolic link to the latest version.su to root (or use sudo if you prefer) and then
root@localhost#ln -s /usr/lib/libXrender.so.1.3.0 /usr/lib/libXrender.so

(3)Troubles
 make: *** [objdir/frontends/optimize2bw] Error 1
Shooting
Adding “LDFLAGS += -lgif” to the Makefile fixes that.


Conclusions:
This open-source scanning software really share efforts in advancing OCR to produce readable and searchable text from a grabbed/captured images in any devices(as source).


Video(OCR processing)


Wednesday, June 26, 2013

Video/Media Streaming Server( MJPG-Streamer)


Introductions:

Video Streaming is an awesome feature/s that you can add with your own published websites.Because viewing a remotely captured frame of images  in real time is quite exciting configurations in your web server. Well, there are a lot of useful applications that technos can do with this tutorial/s; say, using the said application  as home surveillance or monitoring households,  remote sensing and data gathering with images and videos.The  DIY guide of this blog  would not require enthusiast for an expensive equipment(DVR and CAM grabber)-hence a simple web or IP camera will do the trick.I am  telling  you folks to go to CDR-King and buy for your selves the cheapest camera in town.

Yet personally, my sole aim is to put this web cameras on-board the machine ; from-thence  I want to control stuffs remotely.I am practically concern of a DIY mobile robots.Since I've posted it in our FB PSCoE forum, its my pleasure to bring the set-up into details.It is somewhat a simple expectation and  learning curve for advancement of "hobbying" about "internet of things". Wishing that in the near posts there would be more variety of designs involving online machine vision and image processing.

Perhaps , that could be a great challenge to tackle about setting-up a server that is capable of hosting online videos(live) to its clients.Here in our next techno-article we will explain ideas how this purpose would be achieved with free software available (of course for free) on the net.There are two software programs which have given online video streaming a seamless possibilities to geeks in the open source community.These are motion and mjpg-streamer, both run in the different flavour/distro of Linux/Unix OS.Yet for now,  it will be our desire to use mjpg-streamer then motion will be discussed in the next techno-blog-How about that?

During the testing , we will try to use different viewer/player  to remotely capture the videos ,either WAN or LAN streaming.This will happen using:  Apache2 for web ,VideoLAN for local, and CLI command for shell frame monitoring. So without much further ado, lets try to do it now folks! 


Requirements:
Linux OS: Ubunto/Fedora/CentOS (here I used Ubuntu 12.10v)
Two(2 ) or 3 Web Cameras
CPU  core 2 duo /i7 (PC) or Raspberry PI (embedded)


Methodology:

Downloadable
mjpg-streamer download link
http://sourceforge.net/projects/mjpg-streamer/files/mjpg-streamer/Ubuntu%208.04%20packages/

Installations:
root@localhost# apt-get install subversion libv4l-dev libjpeg8-dev
root@localhost# apt-get install imagemagick fswebcam
root@localhost# apt-get install apache2 php php-devel 

1) You can install and compile mjpg-streamer from the source
root@localhost# svn co https://mjpg-streamer.svn.sourceforge.net/svnroot/mjpg-streamer mjpg-streamer

root@localhost# cd mjpg-streamer/mjpg-streamer
root@localhost# make USE_LIBV4L2=true clean all
root@localhost# sudo make DESTDIR=/usr install
root@localhost# cd ../..
root@localhost# rm -rf mjpg-streamer

2) Installation done using apt-get  and opening it with software application launcher
root@localhost# apt-get install mjpg-streamer

Configurations (for device and ports)

(1)check the available  video camera (web/IP ,etc)
root@localhost# ls -lst /dev/video* 

(2)check if its detected by your pC
root@localhost# lspci  

(3) check if it has  driver /brand in linux
root@localhost # lsusb  

(4) check specs and parameters
root@localhost# dmesg

Testing
1) Test If cameras are streaming
root@localhost# sudo fswebcam --verbose
--- Opening /dev/video0...
Trying source module v4l2...
/dev/video0 opened.

src_v4l2_set_pix_format,541: Device offers the following V4L2 pixel formats:
src_v4l2_set_pix_format,554: 0: [0x56595559] 'YUYV' (YUV 4:2:2 (YUYV))
src_v4l2_set_pix_format,554: 1: [0x47504A4D] 'MJPG' (MJPEG)
Using palette MJPEG


2)  Doing the streaming by assigning input(video file ,device camera,resolution,frame and output(web,localhost,etc)
root@localhost#  mjpg_streamer -i "/usr/lib/input_uvc.so -d /dev/video0 -f 60 -r 960x720" -o "output_http.so -p 8085 -n"

2) Browse the video streaming over http
2.1) browse it on the web for streaming
http://localhost:8085?action=stream

2.2) browse it on the web for snapshot
http://localhost:8085?action=snapshot

3) Here are the commands to be included in the script/s to stop and start the mjpg-streamer applications
3.1) To start the application
root@localhost#  mjpg_streamer -b -i "/usr/lib/input_uvc.so -d /dev/video0" -o "/usr/lib/output_http.so -p 8085 -w /var/www/mjpg_streamer -n"

3.2) To stop the application
root@localhost# killall mjpg_streamer

3.3) To restart the application
root@localhost# killall mjpg_streamer
root@localhost#  mjpg_streamer -b -i "/usr/lib/input_uvc.so -d /dev/video0" -o "/usr/lib/output_http.so -p 8085 -w /var/www/mjpg_streamer -n"


Details:

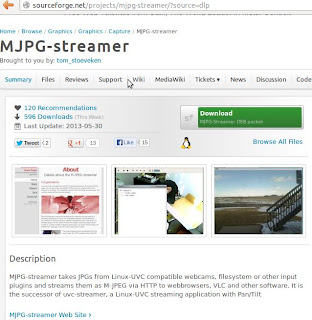
1) MJPG-streamer download site


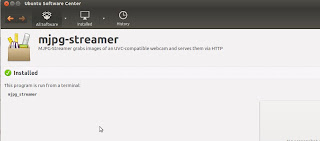
2) Opening mjpg-streamer in a launcher software application


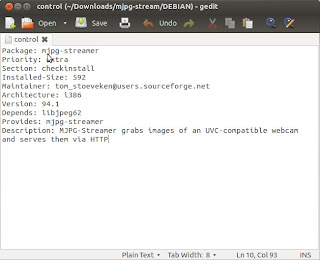
3)  Typo Error 94.1 version


4)  Corrections for typo error : 94_r1 to 94.1 (version)


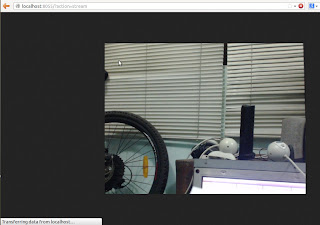
5) localhost with port video streaming


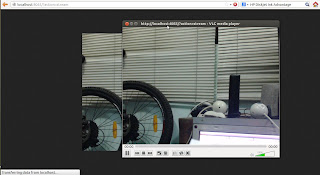
6) Video Lan for video streaming


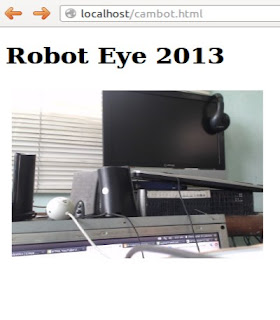
7) Web video streaming with html script and apache2


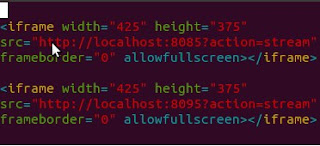
8) HTML  simple web script for publishing two videos


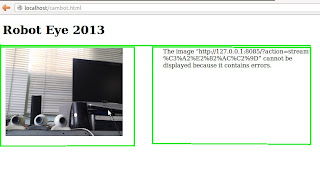
9) Video streaming multi-camera (just two for my spare)


Remarks:

(1)Troubles
The  description of the package version does not comply with the "Center of applications." So  we need to rebuild the package to solve it.

Shooting(a)
1.1) Download the latest build mjpg-streamer_r94-1_i386.deb 
1.2) Renaming it mjpg-streamer.deb 
1.3) Put in the root of your user directory  "tmpdir".
root@localhost# mkdir   tmpdir
root@localhost#  mv  mjpg-streamer_r94-1_i386.deb mjpg-streamer.deb
-->
root@localhost# dpkg-deb -x mjpg-streamer.deb tmpdir
root@localhost# dpkg-deb -control mjpg-streamer.deb tmpdir/DEBIAN

1.4) Now in any text editor change the version number in the file tmpdir/DEBIAN/control with r94-1 at 94.1
root@localhost# nano tmpdir/DEBIAN/control
root@localhost# dpkg -b tmpdir mjpeg-streamer_my.deb

1.5) mjpeg-streamer_my.deb is now ready to install.

Shootin(b)
1.6) Open the file  mjpg-streamer_r94-1_i386.deb and extract it
1.7) Search  and edit  the file "DEBIAN/control
1.8) change the text version DEBIAN/control with r94-1 at 94.1 
1.9) Open it with Ubuntu application launcher


(2) Troubles
input_uvc.so: cannot open shared object file: No such file or directory
 
MJPG Streamer Version.: 2.0
ERROR: could not find input plugin
       Perhaps you want to adjust the search path with:
       # export LD_LIBRARY_PATH=/path/to/plugin/folder
       dlopen: input_uvc.so: cannot open shared object 
        file: No such file or directory

Shooting
2.1) locate "input_uvc.so"
root@localhost# which input_uvc.so
2.2) Install uvc object
root@localhost# sudo apt-get install input_uvc.so
3) Troubles:
Can't display the mjpg-streaming though it streams frame of images
Shooting 
 mjpg_streamer -i "/usr/lib/input_uvc.so -d /dev/video0 -f 60 -r 960x720" -o "output_http.so -p 58180 -n"


Conclusions:
Completed an on-line video/media server, and is now ready to use for a mobile robots