Wednesday, December 7, 2011

e-Learning :Moodle Linux Server setup


Introductions:
Hello Technos!
This would be a great learning stuffs for you to have an on-line learning website

Requirements:
Software:
moodle 2.2
mysql 
php
apache2 

Hardware:
Server CPU (Optiplex 755 QCore )

Objectives:
To test moodle software
To deploy e-learning website

Methodology:
1) Install softwares:
root@localhost# yum install httpd*
root@localhost# yum install php*
root@localhost# yum install  mysql*
root@localhost# wget htp://
root@localhost# cp moodle-latest-2.2.tar.gz /var/www/

2) configure Apache2
root@localhost# vim /etc/httpd/conf/httpd.conf

2.a) Add the following php settings:
2.a.1)Module
# Use for PHP 5.x:
LoadModule php5_module modules/libphp5.so
AddHandler php5-script .php 
2.a2) Index format
# Add index.php to your DirectoryIndex line:
DirectoryIndex index.html index.php
AddType text/html .php
# PHP Syntax Coloring
# (optional but useful for reading PHP source for debugging):
AddType application/x-httpd-php-source phps
2.a3) PHP File handling


2.b) Add/change  the following web directories:
DocumentRoot  /var/www/html 
Document Root "/var/www/moodle"
3) conffigure php
root@localhost# vi /etc/php.ini
3.a)
Add the following entries: 
extension=mysql.so
extension=gd.so
memory_limit=40M
post_max_size = 80M
upload_max_filisize=80M

4) configure mysql
4.a) If its your first time to open mysql
root@localhost# mysqladmin -u root -p yourpassword
root@localhost# mysql -u root -p

4.b) Edit my.cnf , use unicode (UTF-8 format)
root@localhost# vim /etc/my.cnf
Add the following entries 
[client]
default-character-set=utf8
[mysqld] 
default-character-set=utf8
default-collation=utf8_unicode_ci
character-set-server=utf8
collation-server=utf8_unicode_ci

4.c)create database for moodle
root@localhost#  mysql> create database moodle;
root@localhost# mysql > exit;

5) installing  the moodle software
5.a)Let us disable secure linux for a while so that apache is able to create directory
via webpage
root@localhost# echo 0 >/selinux/enforce
root@localhost# chown -R apache:apache/var/www/
root@localhost# chown -R apache:apache/var/www/moodle
root@localhost# cd /var/www/
root@localhost# tar -zxvf moodle-latest.tar.gz

5.b)  browse http://localhost/
         browse http://ip_address

Below are the pictures  details:
Details(0)


Details(1)


Details(2)


Details(3)


Details(4)


Details(5)


Details(6)


Details(7)


Details(8)


  Details(9)


Remarks:
Problem 1:
Web page cannot create a (/var/www/moodledata ) directory
Solution 1: (off security linux for a while)
set off selinux

Solution 2: (enable web directory writability)
chown 777  /var/www/

Solution 3: (apache ownership of the file [permission])
chown -R apache:apache /var/www/
chown -R apache:apache /var/www/moodle
chown -R apache:apache /var/www/moodledata 

Problem 2:
Cannot load mysql for UTF-8 unicode format

Solution 1:(mysql configuration)
edit /etc/my.cnf

Solution 2: (brute force mysql for setting utf-8)

Problem 3:
SELinux is preventing /usr/sbin/httpd from write access on the directory /var/www/moodledata.

Plugin: catchall
you want to allow httpd to have write access on the moodledata directoryIf you believe that httpd should be allowed write access on the moodledata directory by default.
You should report this as a bug.
You can generate a local policy module to allow this access.
Allow this access for now by executing:
root@localhost# grep httpd /var/log/audit/audit.log | audit2allow -M mypol
root@localhost# semodule -i mypol.p

Conclusions:

Sunday, July 3, 2011

EMC PowerPath for multipath I/O

Overview
Multipath I/O is a fault-tolerance and performance enhancement technique in computer storage area networks, whereby there is more than one physical path between the CPU in a computer storage system. The physical multipath is through the buses, controllers, switches, and bridge devices connecting the mass storage.

Introduction
Data Center Scenario:
In our Main library data center environment, the same expectation of high system’s availability must be assured to minimize downtime and cutting mean time between failures (MTBF) on its 24x7 operations.Hence, the application services such as: e-lib, ilib, repository and kiosks that are link in a storage area networks required a set up of multiple redundant data paths (multipath) between a host servers and storage systems to avoid interruptions in data flow and anticipation if ever unexpected hardware failure occur. To manage a multipath I/O configuration, IT administrators should ensure that the server OS supports multipath I/O and is configured properly to access data from the storage system and fail over to secondary data paths when necessary.

Technology Implementation:
Our simple implementation of multipathing is using Dell EMC-500X which is connected to two Fibre Channel ports (FC1 -considered the fastest network carrier for large amounts of information) and the rest are physical path components, adapters, cables, and switches — to create logical paths between the server and the storage device. A network interface card (in the iSCSI case) or HBA should be connected by using redundant switch infrastructures to provide continued access to storage in the event of a failure in a storage fabric component. Should one controller, port or switch fail, causing the path to fail, multipathing logic uses an alternate path for I/O so that applications can still access their data. On the other hand the operating system can route I/O through the remaining controller transparently to the application, with no changes visible to the applications, other than perhaps incremental latency.

Option to Multipathing I/O:
There are two Linux multipath I/O available EMC PowerPath and DM multipath though both have each pros and cons; we preferred EMC Powerpath for a variety of ideal and practical reasons. Provide viable and robust multipath I/O capability for Linux operating systems on Dell PowerEdge servers and Dell/EMC storage systems. This multipath software layers can leverage the redundant paths to provide performance enhancing features, such as:
• Traffic shaping
• Automatic path management
• Dynamic reconfiguration
• Round-robin, adaptive failover
• Basic to advance automatic path failover
• Online recovery
• Supports heterogeneous OS(Windows®, Linux, UNIX®, and Novell NetWare))

PowerPath features:
PowerPath does not use a configuration file but rather it comes with its own init script and can be started and stopped from the command line. However, PowerPath relies on how the HBA driver has detected the LUN and created the block devices, and does not use an administrator-supplied configuration file; its enumeration of LUNs can vary from one node to the next in clustered servers. As with DM multipath, the configurations of the following block devices: /dev/sdb, /dev/sdc, /dev/sdd, and /dev/sde are all bundled to /dev/emcpowera. And once started, PowerPath gathers the UUIDs of the block devices and bundles the devices with the same UUID into a single device, /dev/emcpowerX. As PowerPath identifies the LUNs, it enumerates them as /dev/emcpowera, /dev/emcpowerb, and so on.

PowerPath Operations:
The PowerPath, administrators must stop all I/Os to the devices and unmount them just to confirm that all of the /dev/emcpowerX devices are not in use before issuing the command service PowerPath stop. This device can be partitioned, formatted with a file system, and mounted using the following cli commands: fdisk, mke2fs, mkdir and mount.

Powerpath Utilities:
The software features includes powermt, a powerful management utility for its devices. Its man page (man powermt) provides specific information about the utility. After installation, administrators can start PowerPath by issuing the command service PowerPath start. When stopping PowerPath, administrators should be sure that there is no I/O activity— that is, PowerPath should not be in use by any application. Other features of powermt is allowing administrators to display the current settings; set priority, policy (algorithms), and mode; remove a particular HBA or device; and restore a removed HBA or device.

Requriments:
OS : Centos 64 bit
DELL Servers
FC1 card controller
Fiber Optic Network cables
Lan Networks


Objectives:
To implement Powerpath in a Unix/Linux like platform
To implement EMC-Linux-5-1-0.194.rhel5.i386.rpm in an Intel 64 bit CPU architecture


Methodology:

Steps to make File Systems on Red hat Linux connected to EMC .To prepare the system and install PowerPath, follow these steps:

Below is the screenshot of the EMC PowerPath software’s availability; you may choose which version suits to your hardware architecture


EMCpower.LINUX-5.1.0-194.rhel5.i386.rpm (Intel chip 64 bit CPU architecture)

Step 1:
Set up the system for boot over SRP (SCSI remote Protocol-transferring and commands and data ->modprobe). When the system can boot over SRP, proceed with the steps below to get the system boot over PowerPath. First install below mentioned rpms:

1) EMCpower.LINUX-5.1.0-194.rhel.i386.rpm
2) Naviagentcli.noarch.rpm
[root@db1 ~]# rpm –ivh “rpm name”
root@db1 ~]# rpm -ivh EMCpower.LINUX-5.1.0-194.rhel.x86_64.rpm
[root@db1 ~]# rpm -ivh naviagentcli.noarch.rpm
Start two service mentioned below
[root@db1 ~]# /PATH_EMC/ service PowerPath start
[root@db1 ~]# /PATH_EMC/ service naviagent start
[root@db1 ~]# /etc/init.d/PowerPath start

Starting PowerPath:
done
[root@db1 ~]#


Step 2:
Edit the file /etc/redhat-release and put in the single line
[root@db1 ~]# Starting PowerPath: This package requires RedHat RHEL5."
Red Hat Enterprise Linux Server release 5 (Number of Powerpath version) so that the system is now identifying itself as a RHEL machine.
[root@db1 ~]# cd /etc
[root@db1 ~]# vi rhel5-x86_64

Change the Linux OS release version into the corresponding version of EMCpower.LINUX-5.1.0-
194.rhel.x86_64.rpm


Step 3:
Install PowerPath on the system. Follow the usual EMC PowerPath installation procedure to install PowerPath.
[root@db1 ~]# emcpreg -install (register powerpath)

This will ask you the key.


Please check this key installed on other server connected with EMC by cli command
[root@db1 ~]# emcpreg –list command


This will install key


Check that EMC path is now available or not by a cli command
[root@db1 ~]# cat /proc/partitions


You should see sd* devices in list, if not then reboot server

Step 4:
After PowerPath is installed properly and started, enter the fdisk -l command. You should see output similar to the example below. In this case, only one LUN is assigned to this host, and the LUN is partitioned accordingly.

[root@db1 ~]# fdisk -l


PowerPath is now up and running. The emcpowera* shows the PowerPath pseudo devices.

Step 5:
Creation of file system (Please skip or ignore this steps if it doesn’t support GPT use GNU parted instead)

This will temporarily mount FS
[root@db1 ~]# cat /proc/partitions

[root@db1 ~]# fdisk /dev/emcpowera

[root@db1 ~]# partprobe
[root@db1 ~]# pvcreate /dev/emcpowera1

32M is Physical extend
VOLUME_GROUP is volume group name
[root@db1 ~]# vgcreate -s 32M VOLUME_GROUP /dev/emcpowera1 204800 is size of file system that is 200(GB)*1024
[root@db1 ~]# lvcreate -L 204800M -n EMC /dev/VOLUME_GROUP
Mkfs.ext3 is used to convert the FS in ext3
[root@db1 ~]# mkfs.ext3 /dev/VOLUME_GROUP/EMC

Create mount point e.g. mysql on /
[root@db1 ~]# mount /dev/VOLUME_GROUP/EMC /mysql

Step 6:
Permanent mounting
[root@db1 ~]# edit /etc/fstab
[root@db1 ~]# cd /etc
[root@db1 ~]# vi fstab

/dev/emcpowera1 /emc ext3 auto, nouser, exec

Above entry in fstab will be active on reboot.

Reboot server

Check that FS “emc” is available by
[root@db1 ~]# df –h rw, sync


Step 7:

Testing mysql file copied to PowerPath

[root@db1 ~]# mount /dev/emcpowera1 /mnt/emc/

[root@db1 ~]# mkdir /mnt/emc/mysql
[root@db1 ~]# service mysqld stop
[root@db1 ~]# cp -R /usr/local/mysql/var /mnt/emc/mysql/

Step 8:
Proceed to EMC PowerPath productions.

Details:(1) LUN clustered configuration owned by SPA


Details(2):Basicj highly available SAN configuration with a LUN owned by SPA


EMC PowerPath Remarks:
After the evaluation of the requirements of implementing our storage area networks- multipathing, it is a clever option to proceeds on EMC powerpath features for a various supported reason. Based on our technical experience about practically and simplicity of usage we had dealt it greatly using EMC PowerPath.


Conclusions:
Successful deployment of EMC Power Path(Linux Version )

Note:**
1)Please contact the author(by e-mail) with regards to any set-up deployment/development plan.
2) Reference uses Dell Multipath/Powerpath articles


Thanks!


E^3
Author


Thursday, May 26, 2011

Mysql Workbench Setup (Fedora 64 bit)


Introductions:

MySQL Workbench is a GUI database design tool that integrates SQL development, administration, database design, creation and maintenance into a single development environment for the database system of MySQL.It is a C/C++ program ,running in a multi-platform OS . The Software is now currently owned by Oracle yet most of its bundles are still available freely in the Open-source community.For further references please go to this wiki: http://en.wikipedia.org/wiki/MySQL_Workbench

Hey, I guess am seriously focusing myself into an information system of business data processing.Just recently when I got involved on using SQL and the combined front end software(PHP,PERL,Python,Gambas and etc.).But for now, this workbench is for sure a great help to simplify databasing scheme.

Anyway, sooner or later l'll stick to some of my own coding applications from basic ,average and might as well into wizardness-huh?

Then let's go coding...

Requirements:
Here are some important packages:
libzip-0.9.3-2.fc13.x86_64
python-paramiko.noarch 0:1.7.6-2.fc14
python-paramiko-1.7.6-2.fc14.noarch.rpm

For complete requirements(cut and paste then try it with "yum"):
mysql++-devel.x86_64 0:3.1.0-2.fc14
mysql-bench.x86_64 0:5.1.51-2.fc14
mysql-connector-c++-devel.x86_64 0:1.1.0-0.2.bzr888.fc14
mysql-devel.x86_64 0:5.1.51-2.fc14
mysql-embedded-devel.x86_64 0:5.1.51-2.fc14
mysql-server.x86_64 0:5.1.51-2.fc14
mysql-test.x86_64 0:5.1.51-2.fc14
mysql-workbench-gpl.x86_64 0:5.2.34-1fc14
mysqltuner.noarch 0:1.1.1-1.fc13
mysqludf_xql.x86_64 0:1.0.0-1.fc13

Objectives:

1*)Our objective is to simplify Mysql Database application with the aid of its bundled tools-Mysql Workbench

Methodology:

root@localhost# yum install libzip

root@localhost# yum install perpect

root@localhost# yum install python-paramiko

root@localhost# yum install mysql mysql-server

Install MySql source code
root@localhost# groupadd mysql
root@localhost# useradd -r -g mysql mysql
root@localhost# cd /usr/local
root@localhost# tar zxvf /path/to/mysql-VERSION-OS.tar.gz
root@localhost# ln -s full-path-to-mysql-VERSION-OS mysql
root@localhost# cd mysql
root@localhost# chown -R mysql .
root@localhost# chgrp -R mysql .
root@localhost# scripts/mysql_install_db --user=mysql
root@localhost# chown -R root .
root@localhost# chown -R mysql data

You can have the Mysql configuration optional
root@localhost# cp support-files/my-medium.cnf /etc/my.cnf
root@localhost# bin/mysqld_safe --user=mysql &
root@localhots# cp support-files/mysql.server /etc/init.d/mysql.server

Then check if MyQL is installed:
Note: What we're talking here is a default username and password just to check
mysql is running.You should see where MySql is,and start running its daemon, so here is how to do it..

root@localhost# whereis mysql
root@localhost# cd /usr/local/mysql
root@localhost# ./bin/mysqld_safe &

Open another tab and then go to the same path "/usr/local/mysql/" take note "./bin/mysql" (the dot for mysql/bin).Or to have a soft link to the executable path "/usr/bin/mysql)-that could be a better idea ..you know bro.
root@localhost# ./mysql
root@localhost# ln -s /usr/local/bin/mysql /usr/bin/mysql
root@localhots# mysql
"Bingo!!"

Then proceed to Mysql Workbench
root@localhost# rpm -ivh mysql-workbench-gpl-5.2.34-1fc14.x86_64.rpm

Then goto File->Programming -> Mysql Workbench


Detail(1) Go to the Mysql Download Area


Detail(2) Choose mirror site for download


Detail(3) Downloaded myql work bench


Detail(4) CLI: rpm -ivh mysql-workbench


Detail(5) Run your first installed Mysql-Work bench


Detail (6) Open Mysql work bench connection


Detail(7) A new connection is established


Detail(8) Open Query


Detail(9) Add new table


Remarks:

For some troubles that might occur

1) Permission Denied
Trouble: chown: cannot access `./.gvfs': Permission denied
Solution: chown -R $USERNAME:$USERNAME $HOME

My SQL saga is just beginning..


Conclusions:
Simply Mysql tools

Wednesday, May 4, 2011

RoBook Scanner Software (Beta Release)

Introductions:
The initial effort to informally published a RoBook Scanner software engineering program will just tackle minimal infos.The purpose of this techno blog is a sort of an article for a reader to gain an idea.Idea that really means "pinoy can do it" ,due to some confidentiality of the project ,it is less expected to pull out the whole detail ; yet its explanations therein would be sufficient enough to deal what RoBook Scanner is all about.

The Author is hoping that in a given time 'if given an authority for publishing such systematic idea without hesitant it will be blogged with full detail -clearly and free to the public.But this time as the date of writings just simple documentation is sufficient to depict the contents of this article.

In some ways, this could be another fruitful sharing of thoughts for all of us-I wish that.

Hmmmn, anyway, the software now has done almost its features and the test is how can it be ported to different Linux flavour.So here is what I did for the software package installer .

Requirements:
Need to assure these are available or installed in your OS
Autoconf
Automake
Makepkg
Tar
deb helper

Objectives:
Compile a package installer
1) In Fedora
2) In CentOS
3) In debian/Ubunto

Methodology:

Detail(0) At last..RoBook Scanner Software (Beta )


Detail(1)Package information


Detail(2)Changelog


Detail(3)Target distributions


Detail(4)Package group


Detail(5)Destination directory


Detail(6)Creating the package


Detail(7)A bundle of installer ready for deployment


Remarks:


Conclusions:

Friday, March 11, 2011

SVN repository on Apple Xserve

Introductions:
Whew! How about that ? Well, it seems that it is going to build the application from scratch .Yes, my friend , this is a sort of little story how will you compile libraries and patched in a UNIX like OSX,oh a pain and tasky. I 've done this almost a year ago, but that's only for Linux/Unix like OS (say Fedora or CentOS); but now a little porting of compiling package in UNIX/OSX

Objectives:

To install Repository in MAC Xserve (period!);with yum ,sudo apt-get and fink(why??)

Requirements:

Note:
All the packages were stored at an "installer" named directory
apr-1.4.2.tar.gz
httpd-2.2.17.tar.gz
subversion-1.6.15.tar.gz
apr-util-1.3.10.tar.gz
libtool-2.2.tar.gz
subversion-1.6.16.tar.gz
autoconf-2.68.tar.gz
m4-1.4.tar.gz
db-5.1.25.tar.gz
neon-0.29.5.tar.gz
expat-2.0.1.tar.gz
php-5.3.5.tar.gz
zlib-1.2.5.tar.gz
sqlite-autoconf-3070500.tar.gz

Only fink help in a little while
yum-3.2.29.tar.gz
wget-1.9.tar.gz
fink-0.29.19.tar.gz


Methodology:
Basic Instructions:
1) Download all of those files mentioned above
2) Install and compile
3) debug with --prefixes

[autoconf]
root@localhost# curl -L -O http://ftp.gnu.org/gnu/autoconf/autoconf-2.68.tar.gz
root@localhos# tar -zxvf
autoconf-2.68.tar.gz
root@localhost# cd autoconf-1.2.8
root@localhost# ./configure
root@localhost# make && make install

[BerkerlelyDB]
root@localhost# curl -L -O http://ftp.riken.go.jp/pub/FreeBSD/distfiles/bdb/db-5.1.25.tar.gz
root@localhos# tar -zzxvf
db-5.1.25.tar.gz
root@localhost# cd db-5.1.25
root@localhost# cd build_unix
root@localhost# ../dist/configure --prefix=/usr/local/db5
root@localhost# make && make install

[libtool]
root@localhost# curl -L -O http://ftp.gnu.org/gnu/libtool/libtool-2.2.10.tar.gz
root@localhost# tar -zxvf
libtool-2.2.tar.gz
root@localhost# cd libtool-2.2.10
root@localhost# ./configure
root@localhost# make && make install

[expat]
root@localhost# curl -L -O http://nchc.dl.sourceforge.net/project/expat/expat/2.0.1/expat-2.0.1.tar.gz
root@localhost# tar -zxvf
expat-2.0.1.tar.gz
root@localhost# cd expat-2.0.1
root@localhost# ./configure --prefix=/usr/local/expat
root@localhost# make && make install

[neon]
root@localhost# curl -L -O http://webdav.org/neon/neon-0.29.5.tar.gz
root@localhost# tar -zxvf
expat-2.0.1.tar.gz
root@localhost# cd expat-2.0.1
root@localhost# ./configure --prefix=/usr/local/neon
root@localhost# make && make install

[zlib]
root@localhost# curl -L -O http://zlib.net/zlib-1.2.5.tar.gz
root@localhost# tar -zxvf
zlib-1.2.5.tar.gz
root@localhost# cd zlib-1.2.5
root@localhost# ./configure --prefix=/usr/local/zlib
root@localhost# make && make install

[sqlite]
root@localhost# curl -L -O http://www.sqlite.org/sqlite-autoconf-3070500.tar.gz
root@localhost# tar -zxvf
sqlite-autoconf-3070500.tar.gz
root@localhost# cd sqlite-autoconf-3070500
root@localhost# ./configure --prefix=/usr/local/sqlite
root@localhost# make && make install

[apr]
root@localhost# curl -L -O http://download.filehat.com/apache//apr/apr-1.4.2.tar.gz
root@localhost# tar -zxvf
apr-1.4.2.tar.gz
root@localhost# cd apr-1.4.2
root@localhost# ./configure --prefix=/usr/local/apr
root@localhost# make && make install

[apr-util]
root@localhost# curl -L -O http://ftp.wayne.edu/apache//apr/apr-1.4.2.tar.gz
root@localhost# tar -zxvf
apr-util-1.3.10.tar.gz
root@localhost# cd apr-util-1.3.10
root@localhost# ./configure --prefix=/usr/local/apr-util-1.3.10
root@localhost# make && make install

[mysql]
root@localhost# tar -zxvf mysql-5.xy.tar.gz
root@localhost# cd mysql-5.x.y
root@localhost# ./configure --prefix=/usr/local/mysql
root@localhost# make && make install

[gettext]
root@localhost# sudo su
root@localhost# curl -L -O ftp://ftp.gnu.org/gnu/gettext/gettext-0.17.tar.gz
root@localhost# tar xvzf gettext-0.17.tar.gz
root@localhost# cd gettext-0.17
root@localhost# cd gettext-tools/
root@localhost# ./configure --prefix=gettext
root@localhost# make
root@localhost# make install

[gdbm]
root@localhost# curl -L -O http://savory.googlecode.com/files/gdbm-1.8.3.tar.gz
root@localhost# tar -zxvf gdbm-1.8.3.tar.gz
root@localhost# cd gdbm-18.3
root@localhost# ./configure --prefix=/usr/local/gdbm
root@localhost# make && make install

[Apache]
root@localhost# curl -L -O http://www.ecoficial.com/apachemirror//httpd/httpd-2.2.17.tar.gz
root@localhost# tar -zxvf
httpd-2.2.17.tar.gz
root@localhost# cd httpd-2.2.17
root@localhost# ./configure --prefix=/usr/local/apache2 -with-apxs=/usr/local/apache2/bin/apxs --with-apr=/usr/local/apr --with-apr-util=/usr/local/apr-util --with-zlib=/usr/local/zlib --with-mysql=/usr/local/mysql/ --with-sqlite=/usr/local/sqlite --enable-dav --enable-so --enable-cgi --enable-info --enable-rewrite --enable-speling --enable-usertrack –with-dbm=db5 –with-berkeley-db=/usr/local/db5 --enable-deflate --enable-ssl
root@localhost# make && make install

Browse and test : http://localhost , then you should see the immortal..It Works!

[Subversion]
root@locahost# tar-zxvf
subversion-1.6.16.tar.gz
root@localhost# cd subversion-1.6.16
root@localhost@ ./configure --prefix=/usr/local/svn --with-apxs=/usr/local/apache2/bin/apxs --with-apr=/usr/local/apr/bin/apr-1-config --with-apr-util=/usr/local/apr-util/bin/apu-1-config --disable-neon-version-check --with-neon=/usr/local/neon --with-sqlite=/usr/local/sqlite --with-zlib=/usr/local/zlib

[I]Correct path of SVN repository
root@locahost # chown -R daemon:daemon /usr/local/svn
root@localhost# svnadmin create datacenter

[II] Create a username and password stored in a txt file
root@localhost# mkdir /usr/local/password
root@locahost# cd /usr/local/password
root@localhost# httpswd -cm /usr/local/password/secret admin
root@localhost# enter a new password: "password"

[III]Config Apache now to access SVN services!

root@locahost# vim /usr/local/apache2/conf/http.conf
1) Add the following lines
1.a) to load dav modules
LoadModule dav_svn_module modules/mod_dav_svn.so
LoadModule authz_svn_module modules/mod_authz_svn.so
LoadModule php5_module modules/libphp5.so
DeflateFilterNote Input instream
DeflateFilterNote Output outstream
DeflateFilterNote Ratio ratio

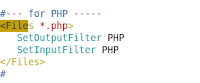
1.b) to add location of SVN path with authentications
#
DAV svn
SVNPath /usr/local/svn/datacenter
AuthType Basic
AuthName "Subversion Repository"
AuthUserFile /usr/local/password/secret
Require valid-user
SetOutputFilter DEFLATE
SetInputFilter DEFLATE
#
root@locahost# cd /usr/local/apache2/bin/

root@locahost# ./apachectl restart

Browse and check : http://localhost/svn/datacenter then enter a user-name and password.

[Php]

root@localhost# curl -L -O http://ar.php.net/distributions/php-5.3.5.tar.gz
root@localhost# tar -zxvf
php-5.3.5.tar.gz
root@localhost# cd php-5.3.5
root@localhost# ./configure --with-apxs2=/usr/local/apache2/bin/apxs --with-mysql=/usr/local/mysql --with-mysqli --prefix=/usr/local/php --with-config-file-path=/usr/local/php --enable-force-cgi-redirect --disable-cgi --with-zlib --with-gdbm=/usr/local/gdbm
root@localhost# make
root@localhost make test
root@localhost# make install

Remarks:
Hints:
Problem : Forbidden Error
Solution:
1.0) Do it always in README
2.0) If ever forbidden error (404,405,400,etc) occurs
2.a) take note the ownership of the /usr/local/svn (directory)
root@localhost# chown -R daemon:daemon /usr/local/svn
root@localhost# ls -alt
Then you should see ownership of the file


Solution:
2.b) check the apahce ownership!
Username daemon
Usergoup daemon

Solution:
2.c) Try to edit the
SVNPath not SVNParentPAth

2.d) and also don't forget to memorize your password
mkdir /usr/local/password
vim secret , then save
htppasswd -cm /usr/local/password/secret

In installing Subversion
Problem: "/usr/bin/ld: cannot find -lexpat "
Solution: download and install expat

Problem:
configure: error: Cannot find libmysqlclient under /usr.
Note that the MySQL client library is not bundled anymore!
Note:
This happen because , we directly Yum installed mysql yet PHP now needs the complete path of MySQL- grrrr!

1) Be sure to download the mysql libraries and add ons:
mysql devel,mysql-php,libmysql

2) Use again "whereis"
root@localhost# cd /usr/local/php-5.version.xx
root@localhost# whereis mysql

Then use --with-mysql=/usr/bin/mysql libdir=lib64
root@locahost# ./configure --with-apxs2=/usr/local/apache2/bin/apxs --with-mysql=/usr/bin/mysql --with-libdir=lib64 --with-mysqli=/usr/bin/mysql_config --prefix=/usr/local/php --with-config-file-path=/usr/local/php --disable-cgi --with-zlib --with-gdbm
..and Yahoo it saves the day...

Conclusions:
Somehow it is always possible!

Thursday, March 3, 2011

Decapod for RoBook Scanner(Phase II)


Introductions:

Welcome back brethren,here once again we'll re figure out the application of Decapod.Its been a long time since the team had paused their development,and I cant wait to tweak the current version simply because most of the program flavor or add-ons are changing so quick .Through these, I needed to recompile Decapod for a chance to enhance its application to its changing flavors(add-ons).


Objectives:
Recompile /install Decapod with its new release add-ons
Debugging a Decapod scripts
Debugging the Decapod source code

Requirements:

sudo apt-get install
libaa1                           ascii art library 
libc6                             Embedded GNU C Library: Shared lib
libcdk5                         C-based curses widget library
libexif12                       library to parse EXIF files
libgphoto2-2                 gphoto2 digital camera library 
libgphoto2-port0          gphoto2 digital camera port library 
libjpeg62                      The Independent JPEG Group's JPEG 
libncurses5                  shared libraries for terminal hand 
libpopt0                        lib for parsing cmdline parameters
libreadline5                  GNU readline and history libraries 

Note : These are the release packages available as the date of writings; other libraries are also with their latest version
Decapod verion. 4.0
libgphoto2 version 10.1
gphoto2-10 version
Ocropus packages:
openfst-1.2.7.tar.gz
iulib-0.4.tgz

Methodology:
Download and Install
Re evaluate the integration of a new compiled Decapod
Test Cameras

root@localhost# sudo apt-get remove libgphoto2-*
root@localhost# sudo apt-get remove gphoto2
root@localhost# sudo apt-get install build-essential
root#localhost# sudo apt-get sudo apt-get install libpopt* libexif*

#for libgphoto2
root@localhost# wget http://sourceforge.net/projects/gphoto/files/libgphoto/2.4.10.1/libgphoto2-2.4.10.1.tar.gz
root@localhost# tar -xvf libgphoto2-2.4.10.1.tar.gz
root@localhost# cd libgphoto2-2.4.10.1/
root@localhost# ./configure
root@localhost# make
root@localhost# sudo make install
root@localhost# cd ..
root@localhost# rm -Rf libgphoto2-2.4.10.1/


# for gphoto2
wget http://sourceforge.net/projects/gphoto/files/gphoto/2.4.10/gphoto2-2.4.10.tar.gz
tar -zxvf gphoto2-2.4.10.tar.gz
cd gphoto2-2.4.10/
./configure
make
sudo make install
cd ..
rm -Rf gphoto2-2.4.10/
rm -f gphoto2-2.4.10.tar.bz2

1)A basic OCRopus installations
root@localhost# hg clone $release https://iulib.googlecode.com/hg/ iulib
root@localhost# hg clone $release https://ocropus.googlecode.com/hg/ ocropus
root@localhost# hg clone $release https://ocroswig.ocropus.googlecode.com/hg/ ocroswig
root@localhost# hg clone $release https://ocropy.ocropus.googlecode.com/hg/ ocropy
root@localhost$# wget -nd http://openfst.cs.nyu.edu/twiki/pub/FST/FstDownload/openfst-1.2.7.tar.gz openfst-1.2.7.tar.gz
root@localhost# hg clone $release https://pyopenfst.googlecode.com/hg/ pyopenfst
date;

2)Or,from Decapod-4.0 package modify "decapod-ocropus.sh" script to replace contents from line 56 to bottom
clone_and_install_ocropus_lib https://iulib.googlecode.com/hg/ iulib
clone_and_install_ocropus_lib https://ocropus.googlecode.com/hg/ ocropus
download_and_install http://openfst.cs.nyu.edu/twiki/pub/FST/FstDownload/openfst-1.2.7.tar.gz openfst-1.2.7.tar.gz openfst-1.2.7 openfst 1.2.7
clone_and_make_ocropus_lib https://pyopenfst.googlecode.com/hg/ pyopenfst
clone_and_make_ocropus_lib https://ocroswig.ocropus.googlecode.com/hg/ ocroswig
clone_and_install_python_lib https://ocropy.ocropus.googlecode.com/hg/ ocropy

# compile iulib
cd iulib
sudo sh uninstall
sudo sh ubuntu-packages
scons -j 4 sdl=1
sudo scons -j 4 sdl=1 install
cd ..
date;

# compile ocropus
cd ocropus
sudo sh uninstall
sudo sh ubuntu-packages
scons -j 4 omp=1
sudo scons -j 4 omp=1 install
cd ..
date;

# compile openfst
tar -zxvf openfst-1.2.7.tar.gz
cd openfst-1.1
./configure
make -j 4
sudo make install
cd ..
date;

# compile ocroswig
cd ocroswig
make
cd ..
date;

# compile ocropy
cd ocropy
sudo python setup.py install
cd ..
date;

# compile Python bindings for openfst
cd pyopenfst
make
cd ..
date;

Detail(1) Libgphoto2 and gphoto2 file dependencies-flow chart


Detail(2) Decapod stereo capture


Detail(3)
Detail(4)

Remarks:

Hints:
1)If you have a G10 which has an older version firmware and you want to update it. Please go to this website and input the serial number of your G10,do it carefully by reading the instruction manual (PDF) to avoid damage in your camera
http://www.canon.co.jp/imaging/dcp/firm-e/psg10/download.html?Submit=Go+to+the+download+page

2) Remove the SD Card of your G10 camera it is necessary to avoid the mounting of G10 memory card drive (it will cause conflict in USB ID and ports).

3)If you can not use a mercurial downloader "hg clone" and its connection is being aborted to that google.code server -one thing is certain. You dont have the certificate to access its "https://" host server.Better install openssl first in your computer so that you can work smoothly to a mercurial copy or downloading.
root@localhost# sudo apt-get openssl
Warning!
if you would change your proxy then (1) reinstall your openssl , (2) delete the ssl certificate; otherwise you can't get the host server (for security reasons).
Conclusions:

Monday, February 28, 2011

Zeroshell Innovation and Deployment


Keywords: Ldap,Kerberos,proxy, captive portal,radius

Introductions:


Hello once again, as you would notice we had done a lot of service applications.I think its time for us to focus (or deviate our views ) on security and networking.Why? well simply because ,we just don't want it to be robust enough for a rigid applications but to secure our system with a centralized access-as our goal.This time we will be discussing a sort of making the safest system to make intruders or hacker wonders away from the scenes of our network confidentiality .Yet,with out the efforts of digging out deep knowledge on how to anticipate those intruders ,malicious access that will ruin our system in peril.Of course not only that , we need to monitor activities(logging) also on 24/7 basis ;for us to analyze rather determine if it is working smoothly or nobody will crash our system -as our assurance.

One thing which may follow is the outsourcing(research ) of appropriate software (which if free..) that will cater all our necessity and requirements.If you could still recall, we had previously tried different free application services on the net: pfsense,ipcop, drupal with chillihotspot and lastly the WifiAdmin.Well they been tested also as good as what they did promised, yet we needed these all to be in one package and Zeroshell have it all.

Zeroshell is a small Linux distribution for servers and embedded systems which aims to provide network services. As its name implies, its administration relies on a web based graphical interface. There is no need to use a shell to administer and configure it. Zeroshell is available as Live CD and CompactFlash images, and VMware virtual machines.Zeroshell is not based on an already existing distribution as for example Knoppix is based on Debian. The author has compiled the whole software of which the distribution is composed starting from the source code in the tar.gz or tar.bz2 packets. The compiler gcc and the glibcs of the GNU have been compiled too and have had the so-called phase of bootstrap in which they have recompiled themselves more times. This has been necessary to optimize the compiler and to eliminate every dependence from the glibcs of the system from which the first compilation took place. Some of the initialization scripts, as well as the guidelines followed by the author are those of Linux From Scratch. For a list of the used software look here.

Some of the innovations that we will aim for this free software are porting its applications to an embedded PC, a rack mounting deployment in our Data Center, then a quality testing on gateway and router applications and lastly to test rigidly all its features.

Best features of Zeroshell:
Captive portal
Radius
Firewall
Router/Bridge/Gateway
MRTG
LDAP
X509 certificates
QOS
Load Balancing
NAT


Requirements:

Phase I
PC (p4 or higher) Zeroshell server
PC (windows) software loader/imager
Image burner software
Zerohshell (linux)
Hard disk (SATA/IDE /USB or CF card)

Phase II
Embedded PC(Soekris Net501)

Methodology:

Download softwares(Windows and Linux)
Linux:
Download install
root@localhost# wget
root@localhost#

Windows:


Setup hardware
Connect the Zeroshell HDD as slave
Open phDiskwriter
Drag the image and save

Detail(1): Download accessories file required for Zeroshell installatios.


Detail(2)Physdiskwrite-GUI as another options (Oww-Russian?)

Detail(1) Please check your working drive to avoid form accident damage
(else forget yourself)


Detail(2) physdiskwrite.exe -u ZeroShell-1.0.beta14-CompactFlash-IDE-USB-SATA-1GB.img


Detail(3) Choosing the 2nd drive is by marking your working HDD


Detail(4) after bytes image "Finish"


Detail(4) A glance of a working prototype -Zeroshell Gateway


Detail(5) Web administration login


Detail(5) Zeroshell menu setup


Detail(6): Zeroshell configuration menu


Detail(7) Assigning WAN/LAN IP address


Detail(7):The issuance of credential /certificate x509 -SSL


Detail(8): Network IP Addressing notes


Detail() Multi Router Traffic Grapher


Detail() Captive portal login:


Remarks:

Hints:
Please take note on setting up a wireless connection using Zeroshell:
Here are our cases:
Case I:
1)We don't have a preferred Altheros wireless card ,instead we will use the available WiFI-Access point.
2) We want zeroshell to captive our wireless clients before an Internet access .

(-)In doing so, our zeroshell will acts like a router/gateway .

1)Zeroshell : 192.168.0.1(internal IP address) ,as a router.
2)Disable the DHCP server of the Wifi Access point (WRTG54g) , make its IP address within the Zeroshell subnets.WRTG54g IP address must be in the subnet range which is assigned by Zeroshell that acts as DHCP server now.
Ex:
192.168.0.1/24 (Zeroshell)
IP address range
192.168.0.2 to 192.168.0.255

3)WRTG54g: 192.168.0.2 now acts as a client

4) Connect Zeroshell [192.168.0.1] ether port to WRTG54g LAN port not to its WAN port! (usually with 4 LAN ports)

5) Wifi-clients (PC or laptops) should be able to access the Internet at this time.
5.1) Refresh wifi network icon
5.2) Connect to the WRTG54g ssid
5.3) You must see a captive portal's login (as mentioned above)
5.4) Then bingo, you are now redirected to the www(:=))

Case II:
1)
We want to directly connect clients to our networks permitted first by Zeroshell
2) Main router/gateway will broadcast IP address to our clients.

(-) In doing so we need to configure Zeroshell in a Bridge Mode setup.

Case III:
1) We want Zeroshell to do the authentication process using external LDAP
http://www.zeroshell.net/eng/qos/#Add-QoS-Class
(-) To do so, we need to configure FreeRadius server hard coded in our Zeroshell to use the LDAP backend instead, this is trough configuring FreeRadius script -radius.conf.
http://www.ibm.com/developerworks/library/l-radius/

III.1) Zeroshell uses freeradius which supports proxy and ldap integration.Find radiusd.conf and edit with vi or emacs ; uncomment the LDAP statement as necessary.

ldap {
server = FQDN for your server or IP address
login = ldap login looks like cn=?,o=?,c=?
password = ldap password
basedn = ou=?,dc=?,dc=?

III.2)To make it work. look for any other sections for ldap then uncomment it.Edit your dictionary.conf, make sure a Value of LDAP IS PRESENT if not add it in or uncomment it.

III.4)Look for users.conf and add the default entry for :
Auth-Type =: LDAP
Fall-Through = 1

Note:
For your LDAP server to authenticate then it should be
ready to serve requests. So reestart freeradius service and Zeroshell should be checking with the ldap server for credentials.

Conclusions:
So far I considered zeroshell as a promising Linux software applications which is a complete embedded web security portal.